Archive | March, 2013

Nutella Rice Krispie Treats

27 Mar

When I first moved to DC, rice krispie treats were my go-to baked good. Easy, cheap, and more importantly super-portable, I was pretty sure they were the perfect food.

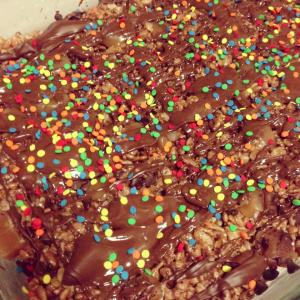
As I’ve spent more and more time baking, I’ve realized that while regular rice krispie treats aren’t half bad, it’s the add-ons that make them truly special. In that spirit, I decided last night to make nutella rice krispie treats with mini chocolate chips, salted whiskey caramel chunks, chocolate drizzle, and of course sprinkles.

733808_647765480815_1369357701_n

Nutella Rice Krispie Treats

5 tablespoons butter (salted)

1 bag marshmallows

6 cups rice krispies

2 large spoonfuls Nutella

1/2 cup mini chocolate chips

1 cup semisweet or milk chocolate chips

1/2 cup salted whiskey caramels (recipe)

Sprinkles

Preparation

1) Butter a 9×13 inch pan (Use real butter, PAM won’t cut it here).

2) In a large saucepan, melt the butter over medium heat, stirring regularly.

3) Add the bag of marshmallows to the melted butter, and stir until melted completely.

4) Remove pan from heat, and add two large spoonfuls of Nutella.

5) Stir in rice krispies.

6) Transfer the mixture to the 9×13 pan, and press down evenly. Wax paper works well for pressing down the rice krispie treats, or you can butter your hands and press down manually.

7) Add caramel chunks and mini chocolate chips, and press gently in to the rice krispie treats.

8) Melt chocolate chips, either stovetop or in the microwave, and drizzle chocolate over the top of the rice krispie treats.

9) Stick the entire tray of treats in the freezer for 10-15 minutes – this will help them solidify and making cutting them less messy.

10) Enjoy!
Salted Whiskey Caramels

26 Mar

While I have quite the sweet tooth, my other great love in life is a good whiskey. In fact, when I moved into my new apartment, my house warming presents were pretty evenly split between baking soda and bourbon – clearly my friends know me well!

That said, it only seemed appropriate that I find a way to incorporate my love of bourbon with my love of baked goods – and these whiskey caramels do just that.

One note – there is no way to make caramels without making a mess. Don’t try this the night before you need to show off your apartment, or the day after you have a cleaning person come. Just trust me on this one.

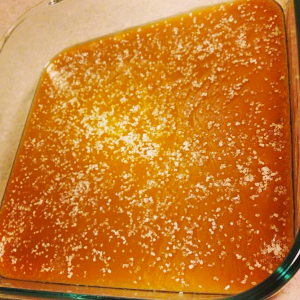
Screen Shot 2013-03-27 at 10.50.31 AM

Salted Whiskey Caramels

5 tablespoons butter (salted)

1 cup heavy whipping cream

¼ cup whiskey (I used Makers 46, but Jack Daniels and Knob Creek also work well)

1 ½ tsp vanilla

¼ teaspoon sea salt

1 ½ cups white sugar

¼ cup light corn syrup

¼ cup water

1 tsp sea salt for sprinkling on top

Preparation

1) Butter a 8×8 pan and set aside.

2) Heat the heavy cream, butter, whiskey, and vanilla over medium heat until it comes to a boil. Remove immediately from heat, and set aside.

3) In a large saucepan, mix the sugar, water, and corn syrup. Heat over medium-high heat, but DO NOT STIR. Bring to a boil, and continue to cook until it is golden brown.

4) Once the sugar mixture is golden brown, stir in the heavy cream/butter mix. Careful: it will bubble up violently. Stir occasionally over medium-high heat until the mixture reaches 244 degrees. This usually takes 15 minutes or so, but will depend on temperature/humidity/etc.

5) Once the caramels have hit 244 degrees, remove immediately from heat and pour into the 8×8 pan. Let sit for 10 minutes, then sprinkle with 1 tsp sea salt.

6) Let cool completely before cutting into 1inch squares.

Vanilla Cupcakes with Lemon Curd and Raspberry Frosting

24 Mar

Cupcakes have been trendy for far too long.

Blasphemy, right? But trust me, any cupcake you make at home will be at least as good as the $5 gourmet cupcake you buy at a gourmet cupcake shop.

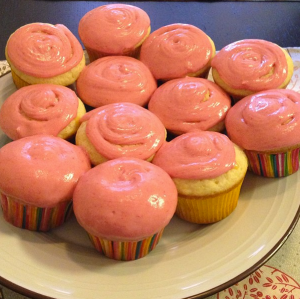
Look at these beauties:

Screen Shot 2013-03-27 at 1.19.25 PM

They may not look like much, but then you bite into the lemon curd center, with the fresh raspberry frosting, and trust me, you’ll be glad you didn’t just go to Sprinkles.

Vanilla Cupcakes

2 3/4 cups cake flour

1 2/3 cups sugar

1 tablespoon baking powder

12 tablespoons butter (salted)

4 large egg whites, plus one whole egg

1/2 cup greek yogurt

1/2 cup milk (1%, 2%, and whole all work fine)

1 tablespoon vanilla extract

1 1/2 teaspoons almond extract

Lemon Curd (adapted from Ina Garten’s recipe)

3 large lemons
1 1/2 cups sugar
1/4 pound butter (salted) at room temperature
4 large eggs
1/2 cup fresh squeezed lemon juice (3 to 4 lemons)

Raspberry Frosting

4 cups powdered sugar

1 cup (2 sticks) butter (salted or unsalted)

1 cup raspberries (rinsed off and dried)

Preparation

First, make the lemon curd, since it will need to set before it can be used.

1) Zest the three lemons (a microplane will work best, but you can also use a carrot peeler).

2) Add sugar to the zest, then add the butter to the mixture. Add the eggs, one at a time, then add the lemon juice. Mix until combined.

3) Pour the mixture into a saucepan and cook over low heat until it reaches 170 degrees (about 12 minutes). Remove from heat, and refrigerate.

Next, make the cupcakes.

1) Preheat the oven to 350, and prepare two cupcake pans with cupcake liners.

2) Combine the cake flour, sugar, and baking powder in a stand mixer. Then, add butter and mix until fully incorporated.

3) Add the egg whites, one at a time, and scrape down the bowl after each addition. Then, add the whole egg, and beat well.

4) In a separate, small bowl, add the greek yogurt, milk, vanilla, and almond extracts. Add this mixture to the batter, and mix until fluffy.

5) Pour batter into the cupcake pans, and bake 18-20 minutes. They’ll be done when a toothpick inserted in the center of a cupcake comes out clean.

6) Put cupcakes on a wire rack to cool while you make the frosting.

Now it’s frosting time.

1) In a food processor, mash the raspberries. Be careful not to overdo it – this shouldn’t take more than 20 seconds.

2) Using a fine sieve, strain out all the seeds.

3) In a stand mixer, combine the butter, powdered sugar, and raspberry mash. Beat until fluffy. If needed, you can add a little bit of milk to get the frosting to the desired consistency.

Build your cupcakes

1) Once the cupcakes are cool, use a cupcake corer (or a knife) to carve out a small space in the top of each cupcake. Be sure to hold onto the piece of cupcake you remove.

2) Fill the space with the (now cool) lemon curd.

3) Replace the piece of cupcake that you previously removed, and frost the top of the cupcake. Enjoy!

Cake Batter Rice Krispie Treats

22 Mar

Back while I was working on a campaign, I often wanted to make something sweet, but didn’t really have enough time for a full blown baking adventure. That’s where rice krispie treat variations saved me – in 15 minutes or less, you’re done and can get back to work.

Cake batter rice krispies are one of my favorites because you can add lots of sprinkles, and really, doesn’t everything taste better with sprinkles?

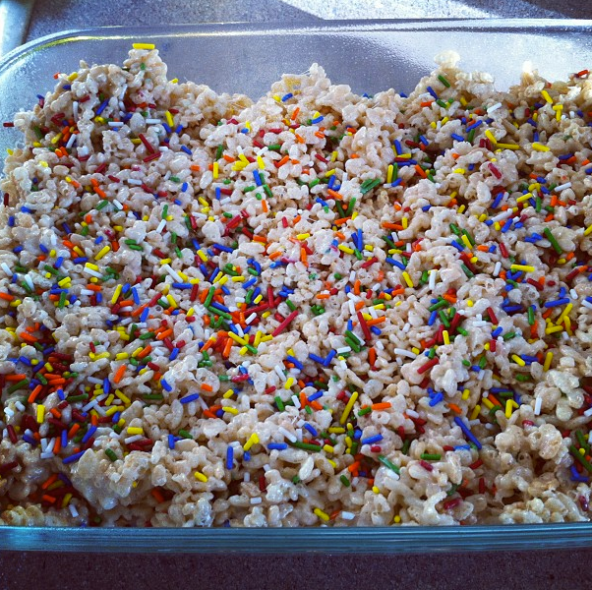
Image

Cake Batter Rice Krispies

5 tablespoons butter (salted)

6 cups Rice Krispies

1 bag marshmallows (mini or regular)

1/3 cup cake mix (make your own cake mix!)

Sprinkles

Preparation

1) Butter a 9×13 inch pan (Use real butter, PAM won’t cut it here).

2) In a large saucepan, melt the butter over medium heat, stirring regularly.

3) Add the bag of marshmallows to the melted butter, and stir until melted completely.

4) Remove from heat, and add the cake mix. Make sure it is completely stirred into the marshmallow mixture.

5) Add rice krispies, and sprinkles. I usually use about a cup of sprinkles, but use your best judgement here.

6) Press firmly into the 9×13 inch pan, and add a few more sprinkles on top for good measure. Let cool completely before eating.

Pumpkin Scones with Spiced Glaze

20 Mar

For as long as I can remember, pumpkin has been one of my favorite flavors. From pumpkin pies made as a small child with my dad, to the pumpkin cookies I discovered in college, I’ve never met a pumpkin I didn’t want to eat.

Then, in my post-college baking adventures, I first learned to make scones. I thought they were magical – the perfect breakfast food. So it only seems right that the first recipe of my new blog would be pumpkin scones.

Hope you enjoy these as much as I did!

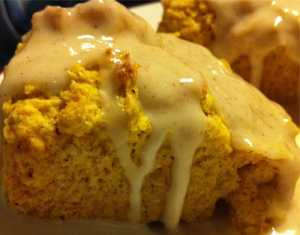
tumblr_mb6crhfx3O1r5o9uw

Pumpkin Scones 

2 cups all-purpose flour

1/4 cup granulated sugar

1 Tablespoon baking powder

1 teaspoon ground cinnamon

1 teaspoon ground nutmeg

1/2 teaspoon ground cloves

1/2 teaspoon ground ginger

6 Tablespoons cold salted butter

1/2 cup canned pumpkin

1/4 cup heavy cream

1 egg

Spiced glaze

1 cup powdered sugar

1 Tablespoon milk (I used skim, but any type will work)

1/2 teaspoon ground cinnamon

1/4 teaspoon ground nutmeg

1/8 teaspoon ground ginger

1/8 teaspoon ground cloves

Preparation

1) Preheat the oven to 425 degrees. Note: if you have a sensitive smoke detector, now is the time to disconnect it.
2) In a medium sized bowl, whip the egg, pumpkin, and heavy cream together. Set aside.
3) In a large bowl, combine the flour, sugar, spices, and baking powder. The baking powder is the important bit here – without it, your scones won’t be fluffy!
4) Use a fork or pastry cutter to cut the butter into the dry ingredients. The smaller the pieces, the more uniform your scones will be.5) Gently fold the pumpkin mixture into the dry ingredients. Be careful not to over mix

6) Form dough into a ball, and place on a floured surface. Using your hands, flatten the dough to approximately 1 1/2 inches in a round shape.

7) Using a butter knife or pizza cutter, cut the dough into 8 equal pieces. Place on a nonstick baking sheet.

8) Cook scones for 14-16 minutes. You’ll know they’re done when a toothpick or knife inserted in the center comes out clean.

9) While the scones cool, make the glaze. First, mix all the spices in with the powdered sugar, then add milk until the glaze is the consistency you want.

10) Once the scones are cool, drizzle over the scones, and let sit for 30 minutes before serving.